Showing posts with label Indiana Railroad. Show all posts

2016/03/31

Traction Terminal Train Shed in laser cut MDF wood


Indianapolis Traction Terminal

2014/11/15

Modeling the Indiana Railroad

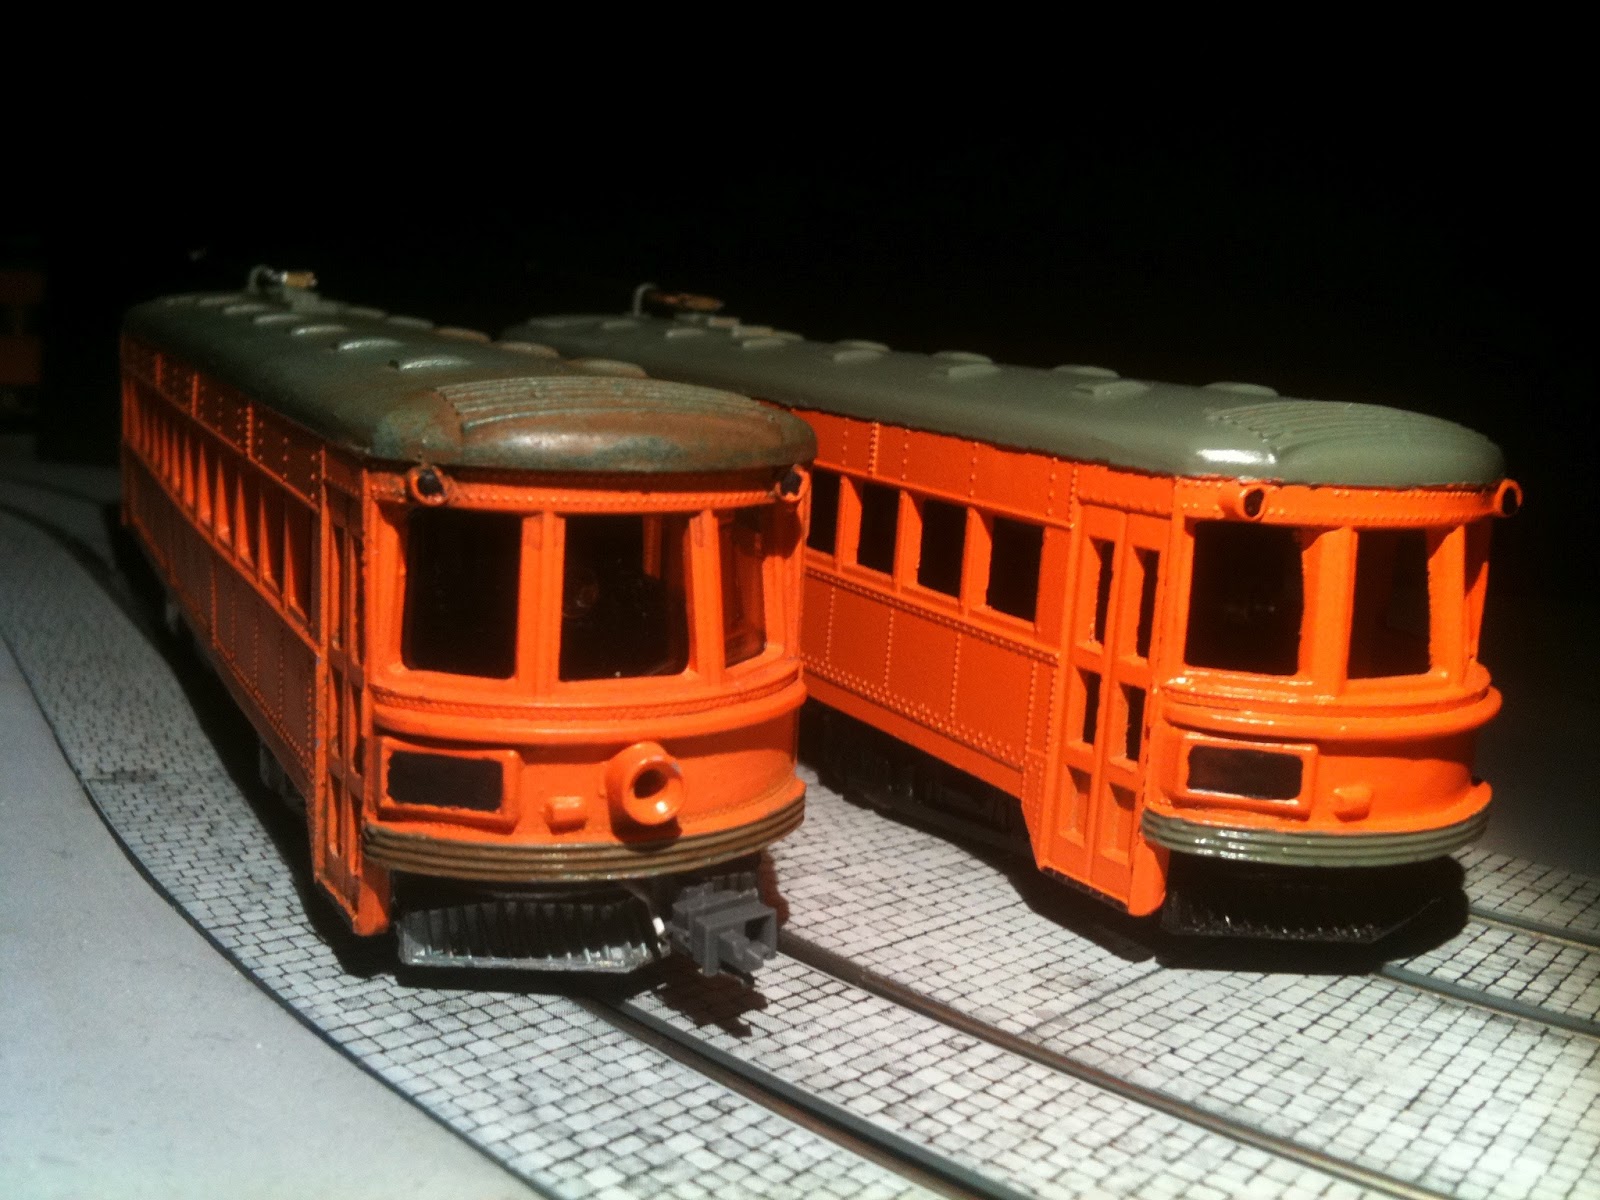
Lightweight 323 in its shiny "Traction Orange" coat is waiting for the first run.
When 323 comes back, it shows its rear face. On the left, an IRR  "High speed" stands ready to exchange passengers.

2014/09/12

Indiana Railroad Lightweight Combines #323-326

After consolidation of all Indiana Interurbans into the Indiana Railroad, the ISC (Indiana Service Corporation) lightweight combines were repainted in IR orange. Otherwise, only small changes were applied: the horn moved to the left side of the cabin, dash lights were added and the standard IRR headlights were mounted. The cars remained on the Northern division until the closing in 1937. 
This version will be soon available in my Shapeways Shop as a 3D printed shell. Underframe and pilot remains the same as for the ISC version.


2014/05/12

Instructions - Fort Wayne Lightweight Combine (FW&L, ISC, IRR, ORR)

Mounting instructions for the St.Louis build Interurban combines.

This instructions will be updated and illustrated, and later moved to my "models" page interurbanmodels.blogspot.com


Available Versions:
  1. Fort Wayne - Lima (available)
  2. Indiana Service Corporation (available)
  3. Indiana Railroad (coming very soon)
  4. Oklahoma Railroad (coming soon) 

The original Fort Wayne- Lima combine (left) was a two man car and run the baggage (B) end forward. The three other cars were one manned and run the passenger door (A) end in front (right on both photos).

Except this, all cars were very similar. On the model, the Bowser motor bogie is located on the B side for all versions. The main difference is the position of the pilot, on version 1 the pilot is located on end B, on version 2 to 4 on end A.

General considerations:

3D prints are not always totally exact to scale. I provided enough space, but if the body doesn't fit over the frame even with some light sanding, you must claim at Shapeways. Nearly all holes a provided on my parts, but not always have the good diameter when printed.

The Frosted Detail material of the body is fragile, be very careful when cleaning and handling. When you have broken a part, you can glue it with a drop of Cyanoacrylate. Don't be discouraged. Sometimes, I have replaced a broken part with styrene strips.

On the opposite, the Strong&Flexible plastic of the floor and the bogie frames is very resistant and dicfficult to cut or sand. If you have ordered the black floor, you don't need to paint this parts.

Tools:

  • Various cleaner (medical alcohol, acetone, toothpaste, soap)
  • Small screwdrivers
  • Small drills 0.3 to 2 mm
  • Fine sandpaper
  • Soldering iron with small head
  • Cutting knife
  • Glue (Cyanoacrylate)

Needed parts:

  • Bowser traction drive (28" or 26" wheels) or a Bowser PCC. The original car had 28" wheels when new. 
  • Working trolley pole (a plastic dummy pole is included in my floor kit).
  • Transparent plastic for glazing

Motorization:

I cannibalize Bowser PCC using the motor, the bogies and the circuit bord with his metal pins. The lights could perhaps be reused, but I have not yet tried out. I unsolder the lights and store them. The surplus PCC shells are also collected for further use. But you can also use a Bowser spare traction drive

Step 1/ Unmount the PCC drive, starting with the cable connectors. Mark the position of cables, if you are not sure how to remount them. Unscrew the motor truck bolster and the trailing truck. Unmounting the motor bogie requests to remove the wheel cover and the wheels. Unscrew the motor. Remove carefully the metal pins supporting the circuit board.

Step 2/ Remount the PCC drive (or mount the spare part drive), start by screwing the motor.

(to be followed)


2014/05/04

Indiana Service Corp. #323 Lightweight Combine

ISC #323

Indiana Service Corporation Combine #323-326, one manned. This is my interpretation of ISC colors, yet without striping and lettering.

2014/01/20

Indiana Service Corp. Lightweight Interurban Combine


(Update with a new render view, 2014, 01 20)


About 1928, Master Mechanic Arthur Reddersson from Indiana Service Corporation transformed the four ISC Lightweight Combines to one man operation by reversing the car, the former rear end becoming the front end. A folding passenger door was installed on the right, and a drivers cab window on the left. 

This 3D printed model is ready to receive a Bowser Drive with 28" wheels.
Before the first test print, some last details will be fixed.


The colors shown here are probably not prototypical and are subject of further research. Under Indiana Railroad management the cars were "painted traction orange" and altered again a little, dashlights were added, the air horn and the front light modified.


2013/10/10

New in my library: CERA Bulletin 102 - Electric Railways of Indiana


My latest add in my library : 
Electric Railways of Indiana - Book II
CERA Bulletin 102
1958, Central Electric Railfan's Association (CERA)
spiral bound, 176 pages

This booklet contains many photos, including some very rare color photos.

Another delight are the drawings : I found Union Traction 400 class, UTC 427 class, the Indiana Service Corp. 375 class and their trailer 390. Contains also blueprints of the Highspeeds, the IR 90 class, and of the big wooden Ft Wayne - Wabash 500 cars...

This is 3D work for years and years, folks! And not enough, CERA Bulletins 101 and 122 will come to me soon.

2013/09/26

Ft Wayne Interurban Combine - Unterbody parts


Only few images exists from the Fort Wayne - Lima Interurban Combine, and the unterbody parts are hardly to see on them. Fortunately, better photos exist from the mostly identical Indiana Service Corp cars.

On one side we can see
1 - a fuse box reverser box
2 - a four bloc resistor grid, with perhaps the 3rd position empty
3 - a drawbar
4 and 5 - air tanks


On the other side there are
1 - probably the compressor
2 - an unknown small cubic device
3 - the brake cylinder
4 - an unkown device with a chain
5 - a square box, probably the switch box

Does anybody have further information about this parts? What is the unknown device #4 with his "bicycle chain" ?


2013/06/12

Fort Wayne & Lima semi-lightweight combine

The Fort Wayne & Lima Railroad purchased in the 20ies several semi-lightweight combines built by St. Louis in an effort to cut operating costs. Identical cars were delivered to the Indiana Service Corporation. Shortly after delivery, this cars were one-manned by turning "back to front"

When the Fort Wayne -Lima was abandoned in 1932, five cars were purchased by the Oklahoma Railway. A sixth car, #91, was used as a building and is presevered by the Illinois Railway Museum.


This car is currently drawn as a printable 3D file. Most of the variants (Ft Wayne & Lima, ISC, Indiana Railroad, Oklahoma Railroad) would be made available. Motorisation could be a Bowser or a Hollywood Foundry drive.

2012/04/23

Indiana Railroad Highspeed 3 car train


Added a third car to my Indiana Railroad "Highspeed" Multiple Unit train. This is actually a dummy car.

2012/03/20

IRR highspeed, some photos after painting

Two IRR Highspeed Lightweights, on the right without (portable) headlight

End view. The car on the right has square marker light boxes

In front, a coach-baggage car
Back, a coach-parlor car. 

2012/03/15

IRR Highspeed, coach-baggage version in HO

Orig. image :en.wikipedia.org/wiki/File:Indiana65.jpg
Having added the rear baggage door, blog reader Greg Melby from Seattle reminded me not to forget the marker lights. I hesitated, but it needed to be done.

The second batch of cars build by Pullman, this with the baggage compartment, had square marker light boxes.

In fact, this was not so hard to make. I simply make the round light boxes square with model filler.

There is no danger, because if you fail, you can remove filler with a metal brush and start again.

Normally, front and rear marker light boxes were the same so you need to make the same operation on the front.

Except for one car : 72 had once a severe front collison (http://www.davesrailpix.com/irr/jpg/irr82.jpg) and was later rebuilt with round light boxes in the front. So I decided to make the car 72 car 78.

(Update : in fact the car with round marker light boxes at front and square boxes at rear end was car 78 ...)

But I made another change : Sometimes, IRR Highspeeds run without the big headlight, who was removable.

Specially in MU operations as a second or third car, or sometimes in daylight runs.

On the die cast shell, I removed the headlight with a drill, and after some care with filler and sandpaper and a coat of primer, the future Indiana Railroad 72 78 looks like this. Not so bad for a Pennsylvania Scale Model who is dating back to 1958, slightly older than me ...


2012/03/04

IRR Highspeed with rear baggage door

Indiana Railroad Highspeeds
The die cast Pennsylvania Scale Model (or Bowser model) of the IRR Highspeed reproduce the coach-parlor version built by ACF with the car numbers 50-63.

The cars 64-84, built by Pullman, had a rear baggage compartment with a folding baggage door in place of the emergency door of the ACF coach-parlor cars.

I wanted to have al least one IRR-Highspeed in the coach-baggage version. For that, on one body shell, I cut out the place for the door and build this door of styrene. Next step: the paint shop.


IRR Highspeeds : Coach-Parlor and Coach-Baggage version

2012/02/04

Indiana Railroad Highspeed Multiple Unit


Indiana Railroad Highspeed Multiple Unit in HO scale.

Made from the old die-cast models from Bowser, with new Bowser PCC drives. They have functionally Bemo couplers connecting both cars electrically for smooth riding.

The cars can operate as single units, a third unit is under construction.

2012/01/23

Indiana Railroad Highspeed fleet in HO scale

IRR Highspeed in HO scale
The model and the inspiring book


Yesterday was the rollout day of the painted and weathered model. It is still missing window glasses, couplers and some other details.

By a "coup de chance", I found two other models, so later I will compose a full three car train.

All three models are in fact slightly different. The oldest one is equipped with the old Bowser mecanism and 8 mm wheels. In this configuration, the distance of the trucks is slightly too short. To match the real car, the leading truck must be advanced some millimeters. But the wheel diameter is correct.

The second has still the old Bowser mecanism, but 30" wheels (8.8 mm). This wheels are too big, the prototype had 28" wheels, 8 mm are matching better. The truck distance ist still not correct. On both old versions, truck sideframes are made of die cast.

The third car has the new Bowser can motor mecanism and 8.8 mm wheels, but the truck distance is correct now. Truck sideframes are made of plastic. This new model is a poor curve rider, due to some conceptual errors.

I used the base of the third model first. The new Bowser mecanism was replaced by a new Bowser PCC mecanism with his 8 mm wheels, with the IRR truck sideframes clipsed on. After this easy modification, the car can ride very small curves with a radius of only  5.5 inches. The two other cars will be modified with a Bowser PCC drive too.

2012/01/03

Indiana Railroad "Highspeed" in HO scale


Having an Indianan Railroad car in HO scale was a longtime dream. Virtual railroading is tricky and not always relaxing.

Recently, I had the chance to buy a Customtraxx/Bowser Indiana Railroad "Highspeed" for a very moderate price. The car - actually out of production - was announced on Ebay as "not working", the trolley pole missing.

After shipping to Europe for half the buying price of the car, I found that the body shell, based on a cast probably 40-50 years old is still a good reprodction of this lightweight interurban cars.

A second look showed that a mecanism of a new Bowser PCC would match exactly. So I unmounted the old motor with a saw (no other way to put him out) and adapted a "cannibalized" Bowser PCC drive.

The car runs very smooth through a 14 cm radius (5 1/2 in), I think he could even turn tighter.

The car will be equipped with functional head and tail lights, the holes are alread drilled. Next step : cleaning, smooth sanding and painting of the shell.